Dataverse For Teams Import Options - Excel
Clarification! In my previous article, "Dataverse Import Options" , I stated that SharePoint has what is known as the View Threshold limit, once your row count goes beyond this threshold then the performance of some features would begin to degrade. This is still true for On-Prem instances but this does not appear to be the case for Online instances.
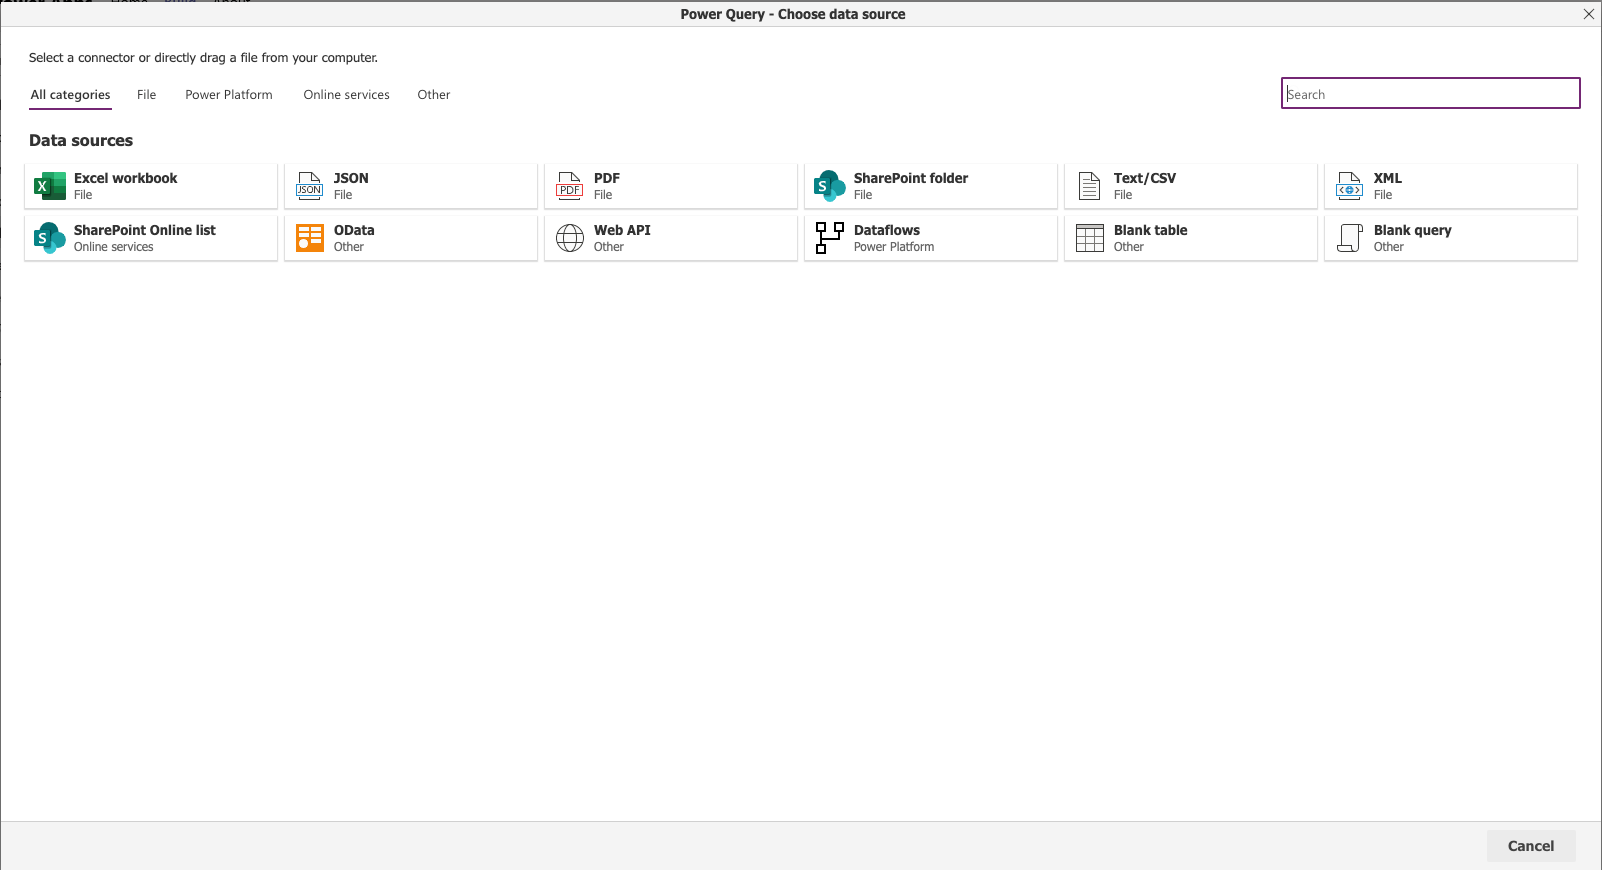
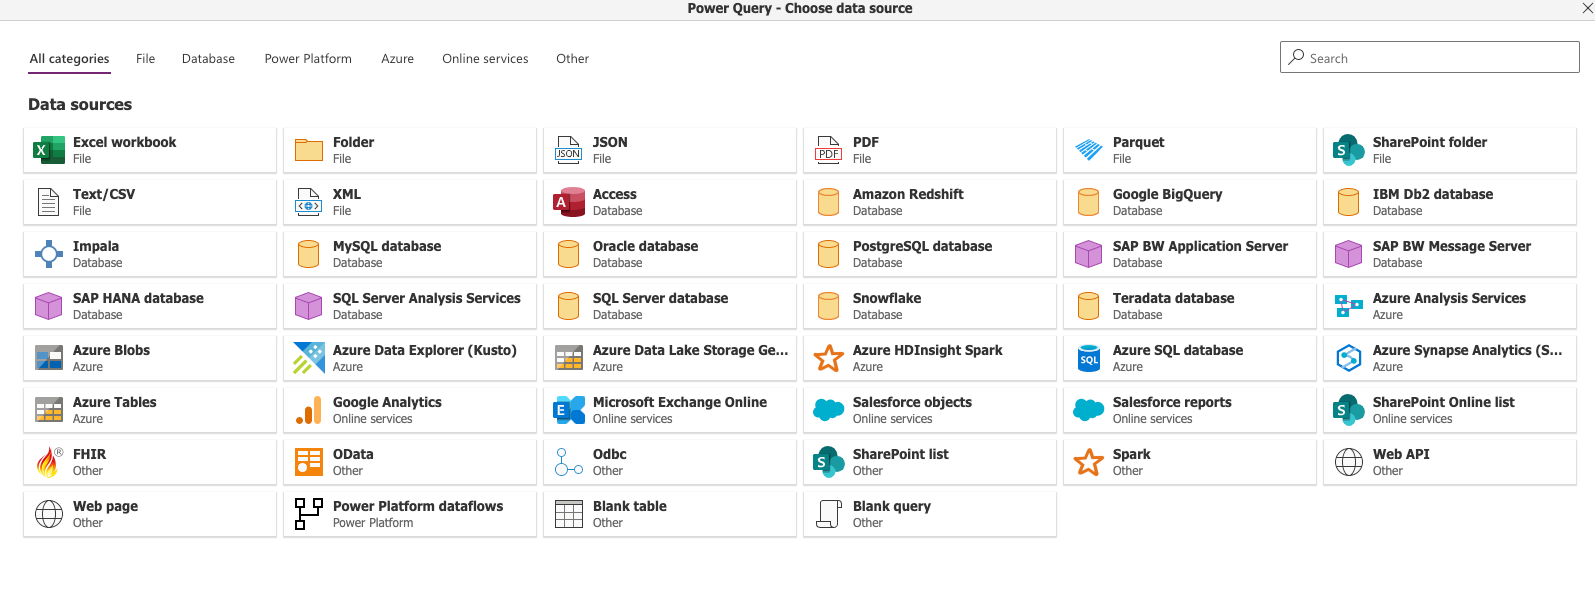
As you can see in the image above that in Teams we have a smaller set of import options than we have in the full version of Dataverse.
I also mentioned that we could use the Excel Add-in but that depends on your company policies, my company does not allow Add-ins.
Let's walk through three of the import options in our Teams environment: Text / CSV, SharePoint Online list and Dataflows.
Level the field!
Add the Power Apps Tab to the Teams Side Panel, or is the panel called a Blade like in Azure?
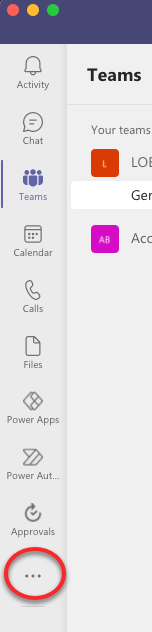
Select the horizontal ellipsis button the ...
Search for Power Apps
Next if you wish to keep the Power Apps tab visible, you need to pin it to the panel by right clicking the tab and then select Pin
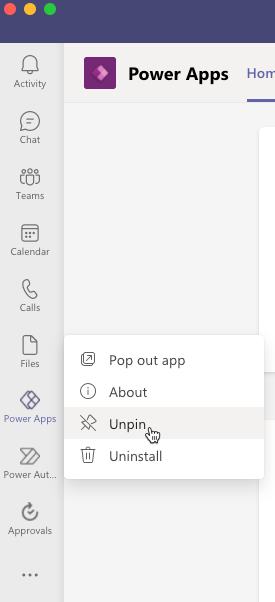
I would suggest at this point before you do anything else, select Pop out app. This will put the Power Apps dev environment into it's own window.
The reason I like to have a separate window is because on several occasions my changes were lost due to I was interrupted by a Teams meeting notification, a call, and even a chat notification.
There is a way to setup automatic saves but there seems to be a bit of a grey area of time between your change and it actually being committed to the server, and this is where the notifications may interrupt the save process. Not scientifically proven, just my opinion based on my experience.

We see a limited set of our apps on this screen, we either select the Build tab in the top menu bar or select the See more -> link. Either one brings us to the following screen.
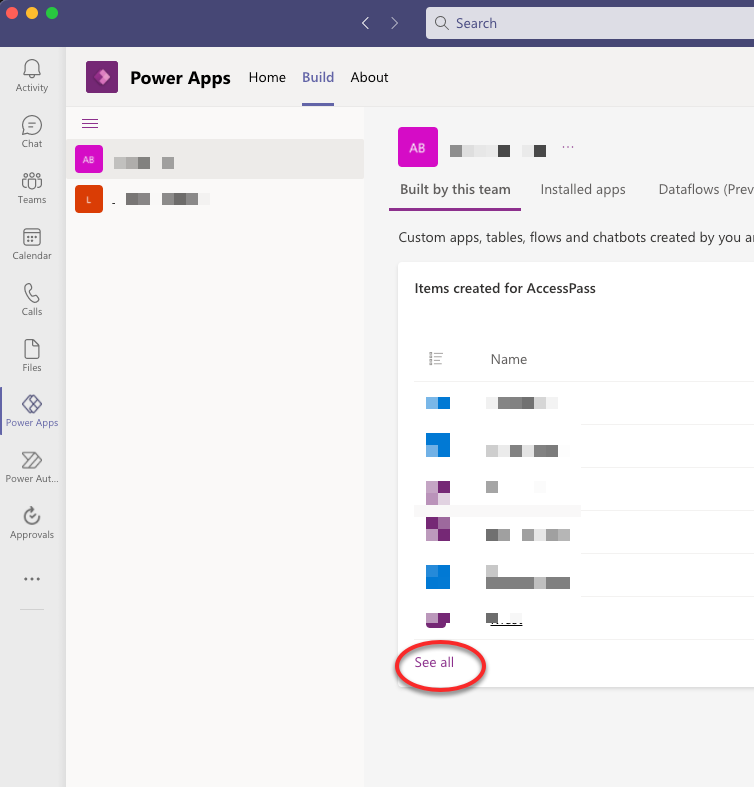
To see all of our apps and other assets we would select the See all link.
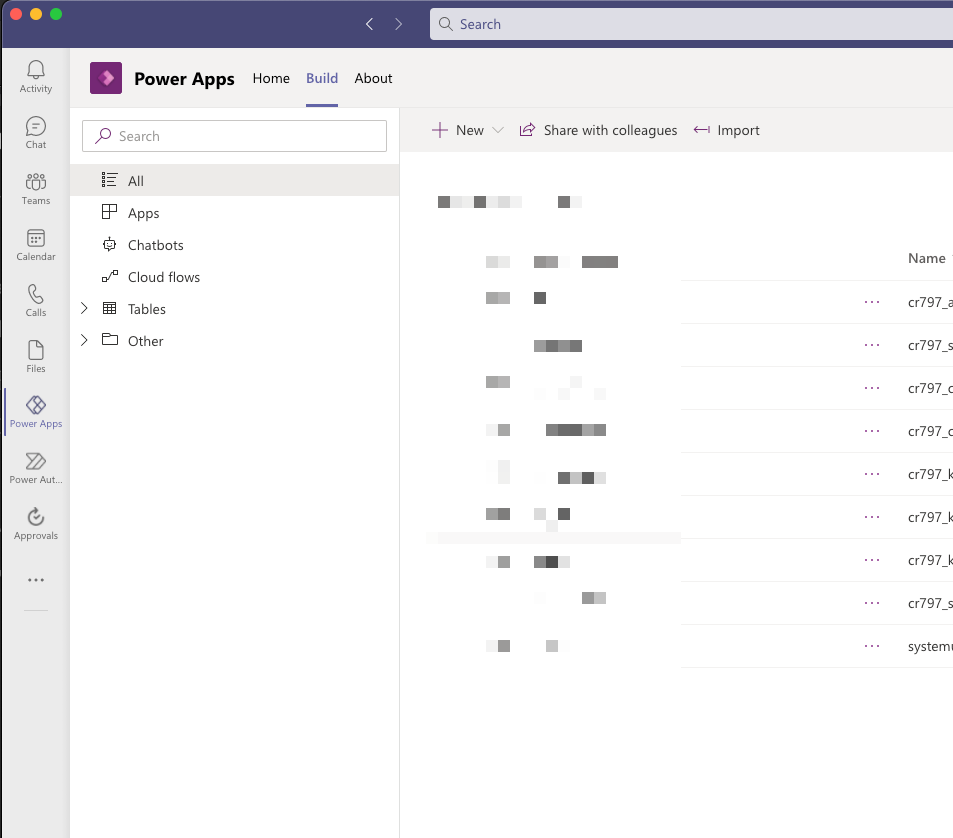
In my opinion I would like to have a direct link to this screen in the main menu bar, I find I need to visit this screen more often. It would be great if we could eliminate having to drill down several screens and just have a single link in the main menu bar but like I said this is just my opinion.
This article is about importing data to our Dataverse for Teams tables. Let me point out that the <-| Import link you see in the screenshot above is for importing solutions not data.
We need to go through a few more steps before we can import data into our tables.
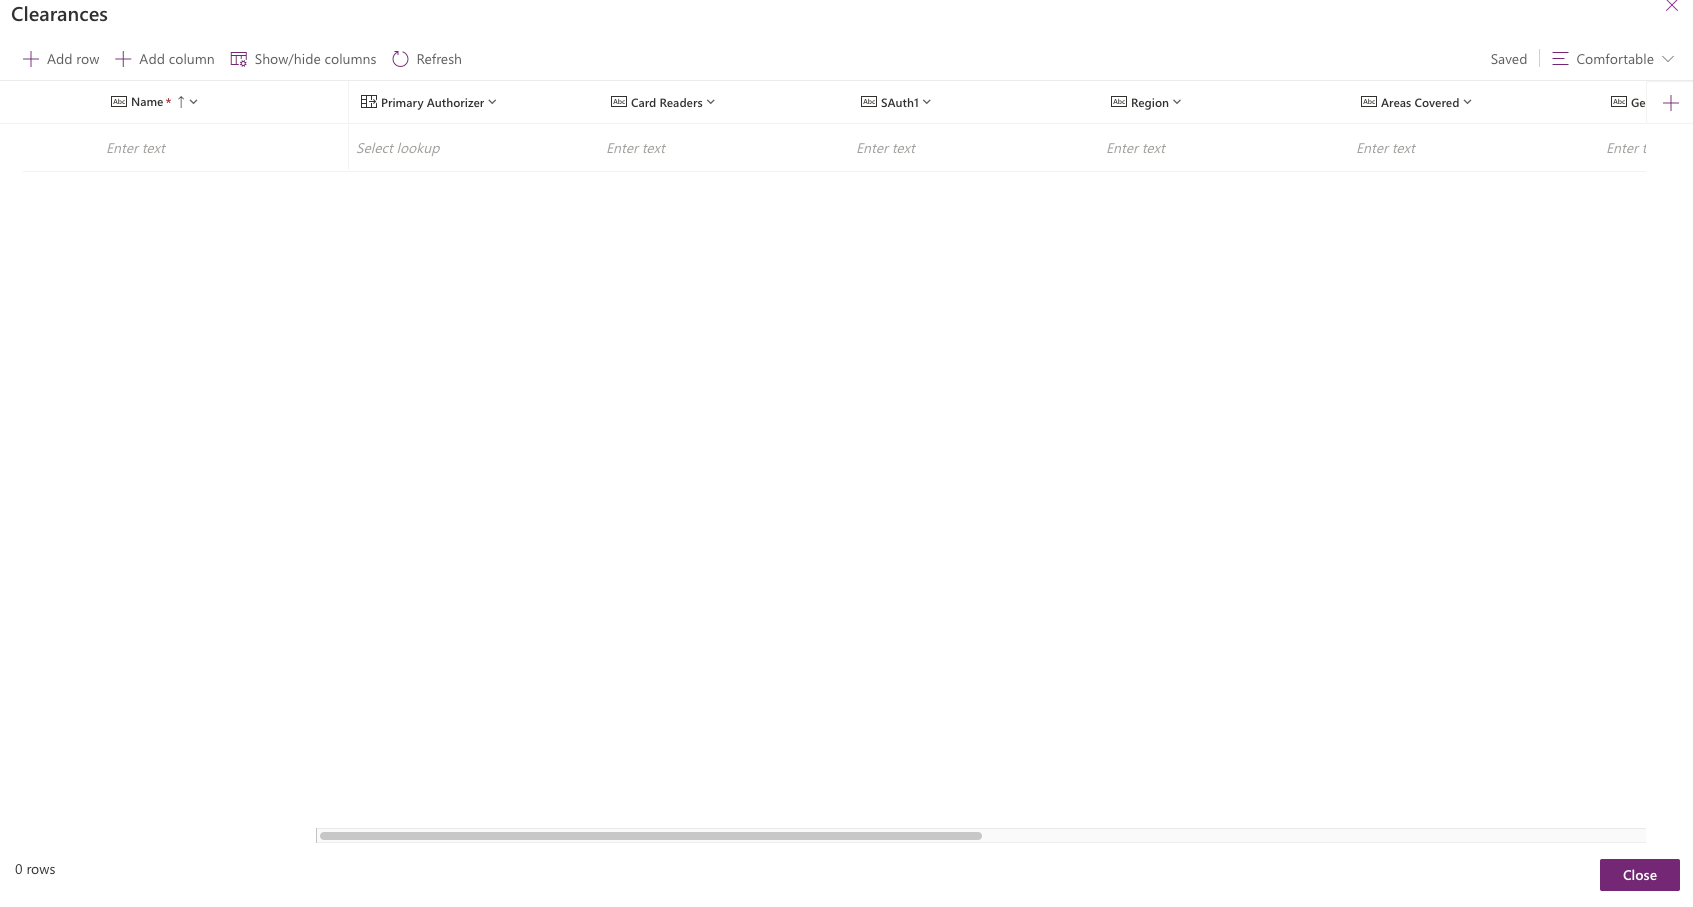
If you select one of your tables you will see that there is no option to Import, we can select the Edit data link and this will take us to our edit data view.
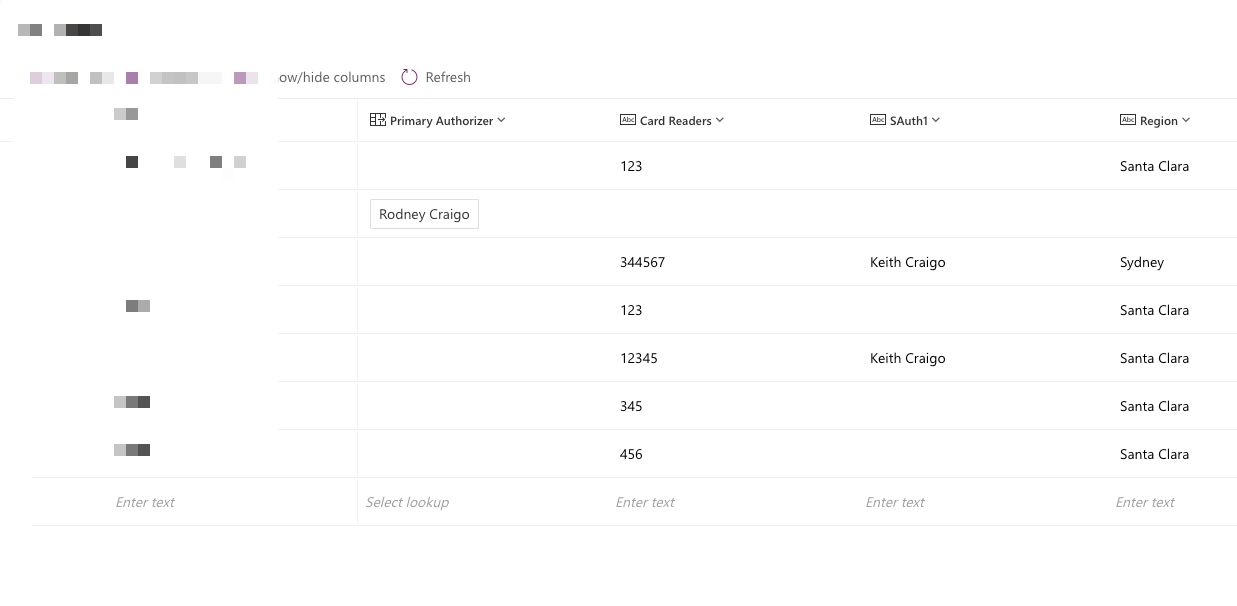
Which is the same view if you were to select a table in your Power App for Teams solution.
But there is still no Import option, you can only add a single row at a time in this screen.
But what if you need to import thousands of rows of data, I don't know about you but I'm not going to enter one row at a time. Thankfully there is an option to do this but we have to go back a step.
My opinion again! It would be better to have an Import option on the table view as well as on the Edit data view.
Let's go back to our table view
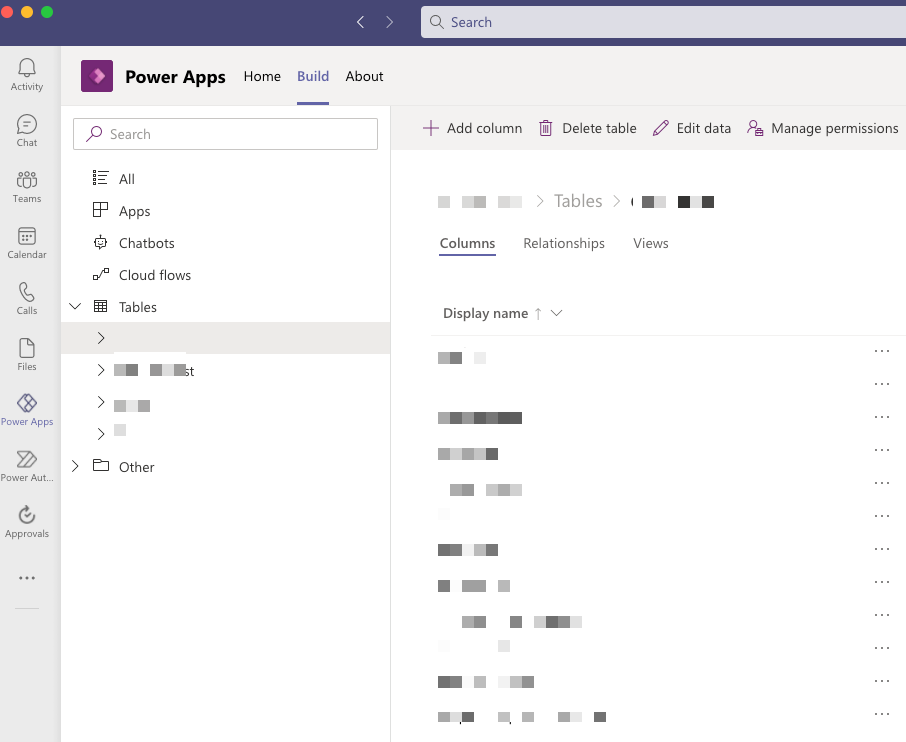
Select the Tables link in the breadcrumb navigation: [Your Solution Name] > Tables > [Your Table Name]
Select Get data from the dropdown
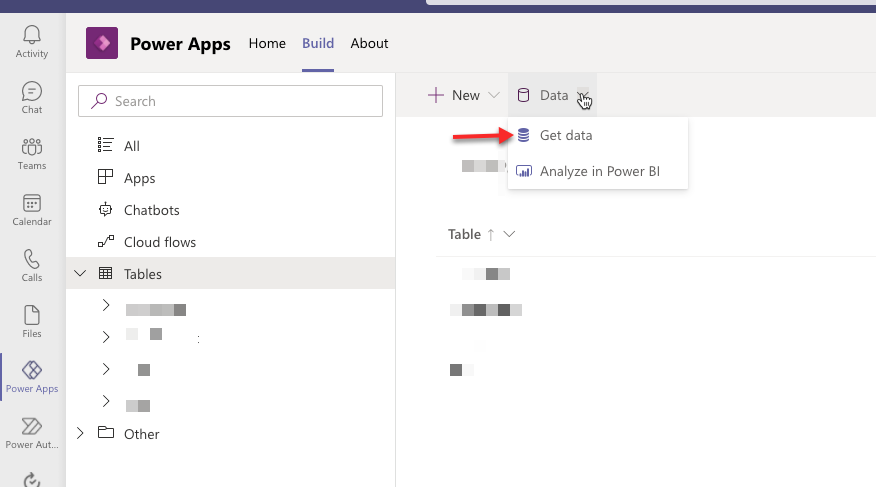
Now we see our Power Query dashboard.
Text/CSV
Text/CSV files can be created by saving an Excel Spreadsheet with the .csv extension, using the Export to csv function in your SharePoint list or manually created. There are a number of other ways to create a .csv file, I'll leave this up to you.
TIPS
- Make sure your Dataverse table contains the columns you wish to import from your source data.
- Don't import lookup column values. The Import will silently fail if you include lookup column values!
- Don't import uneccessary columns, this helps save space in the Dataverse for Teams database. You are limited to 2GB of data.
Import
We can now choose the location of the file we wish to import either from our OneDrive or your Computer.
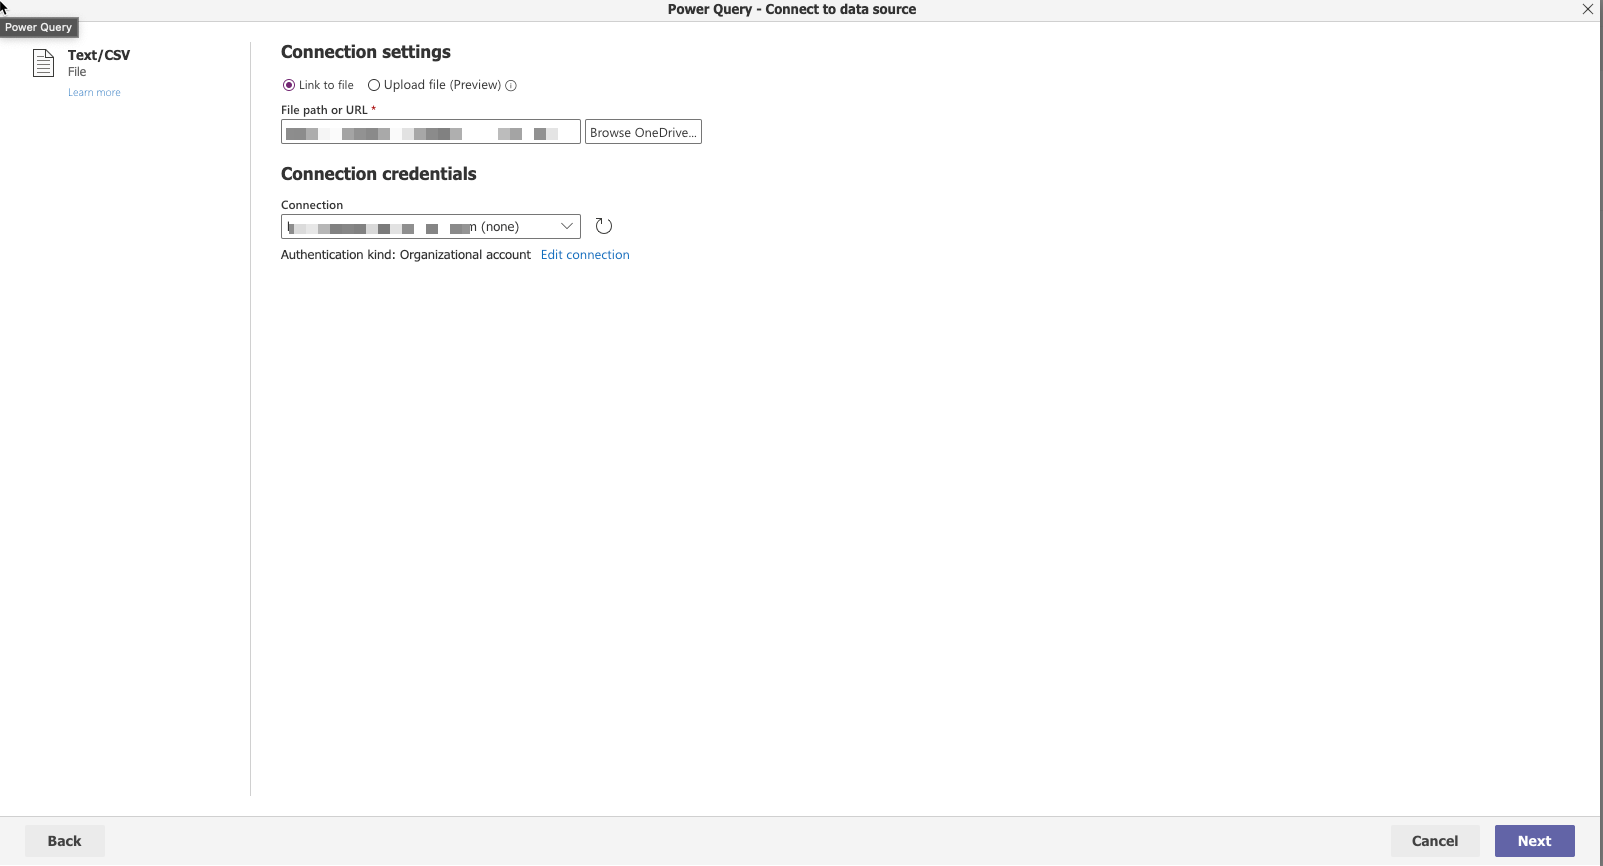
File Path is self explanatory.
Connection credentials, this is typically your account email address but on occasion the system sometimes populates the connection with your tennant URL. Why? I do not know at this time, it happens randomly.
Click Next
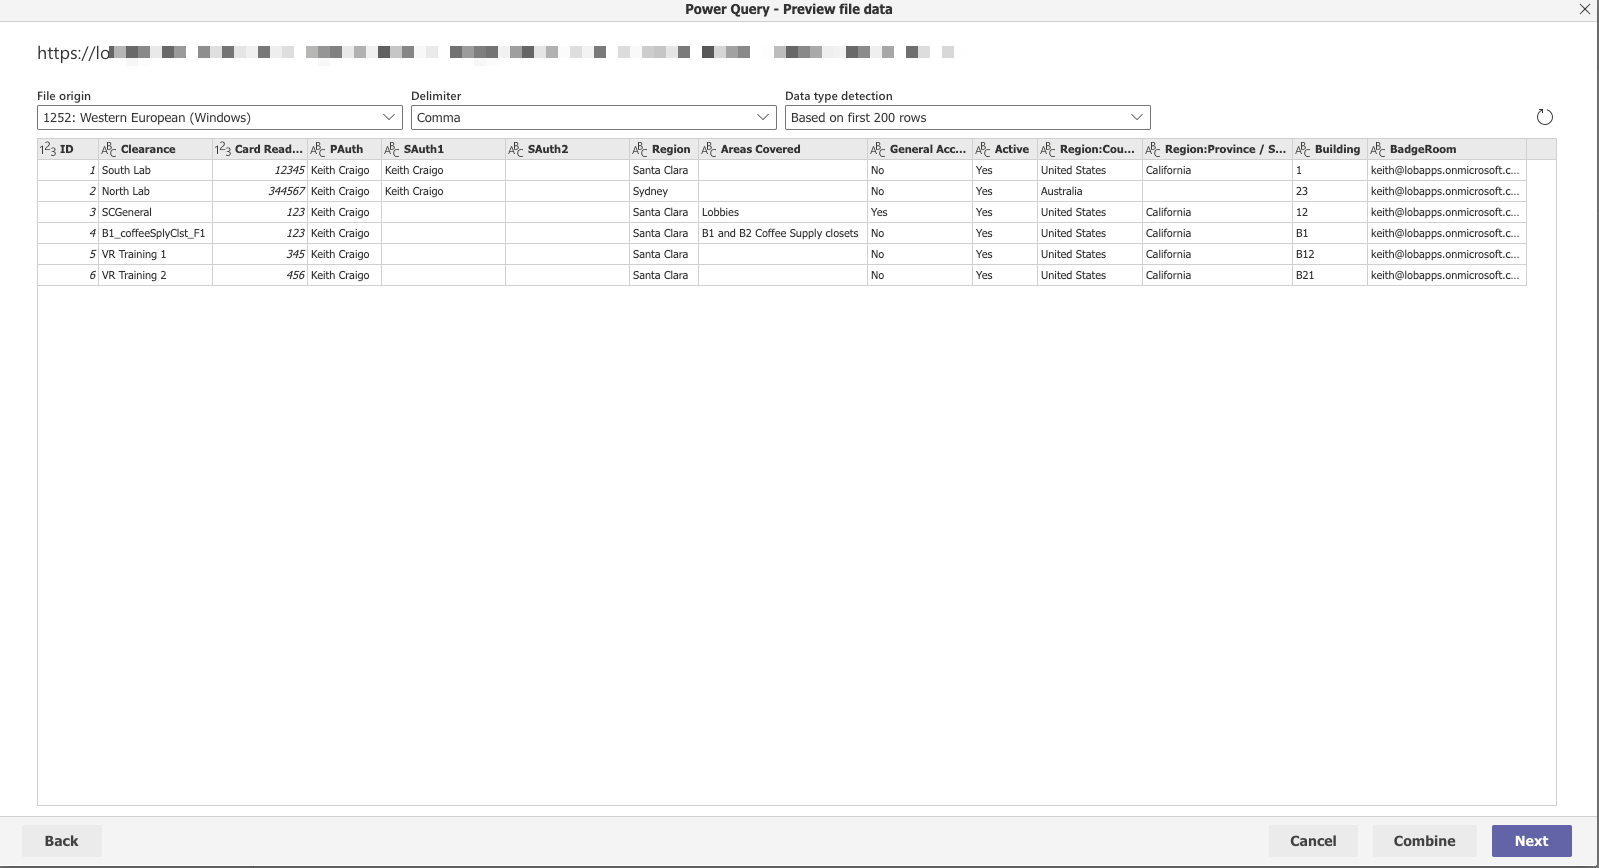
You could select Combine to view the contents in csv format but I've not used this feature myself and I am not really sure of it's purpose at the moment.
For now let's just select Next
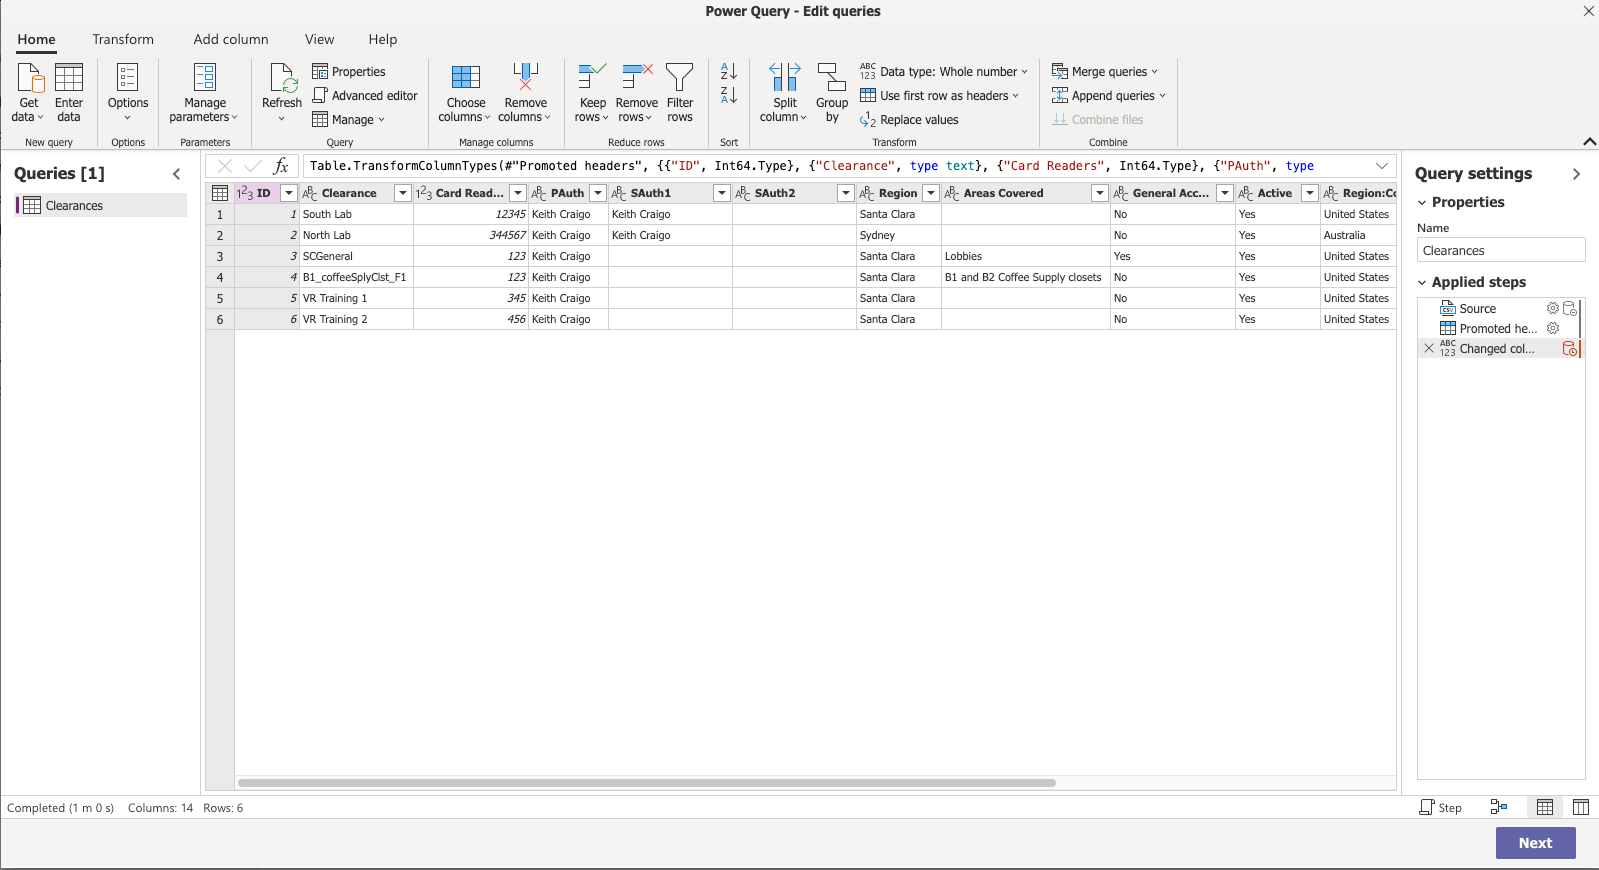
I choose to remove the ID column due to I setup an auto incrementing ID column in the database, no need to import another ID. I also will remove any empty columns. In Dataverse for Teams you are only allocated 2GB of storage, no need to take up valuable space with an empty column.
Click Next
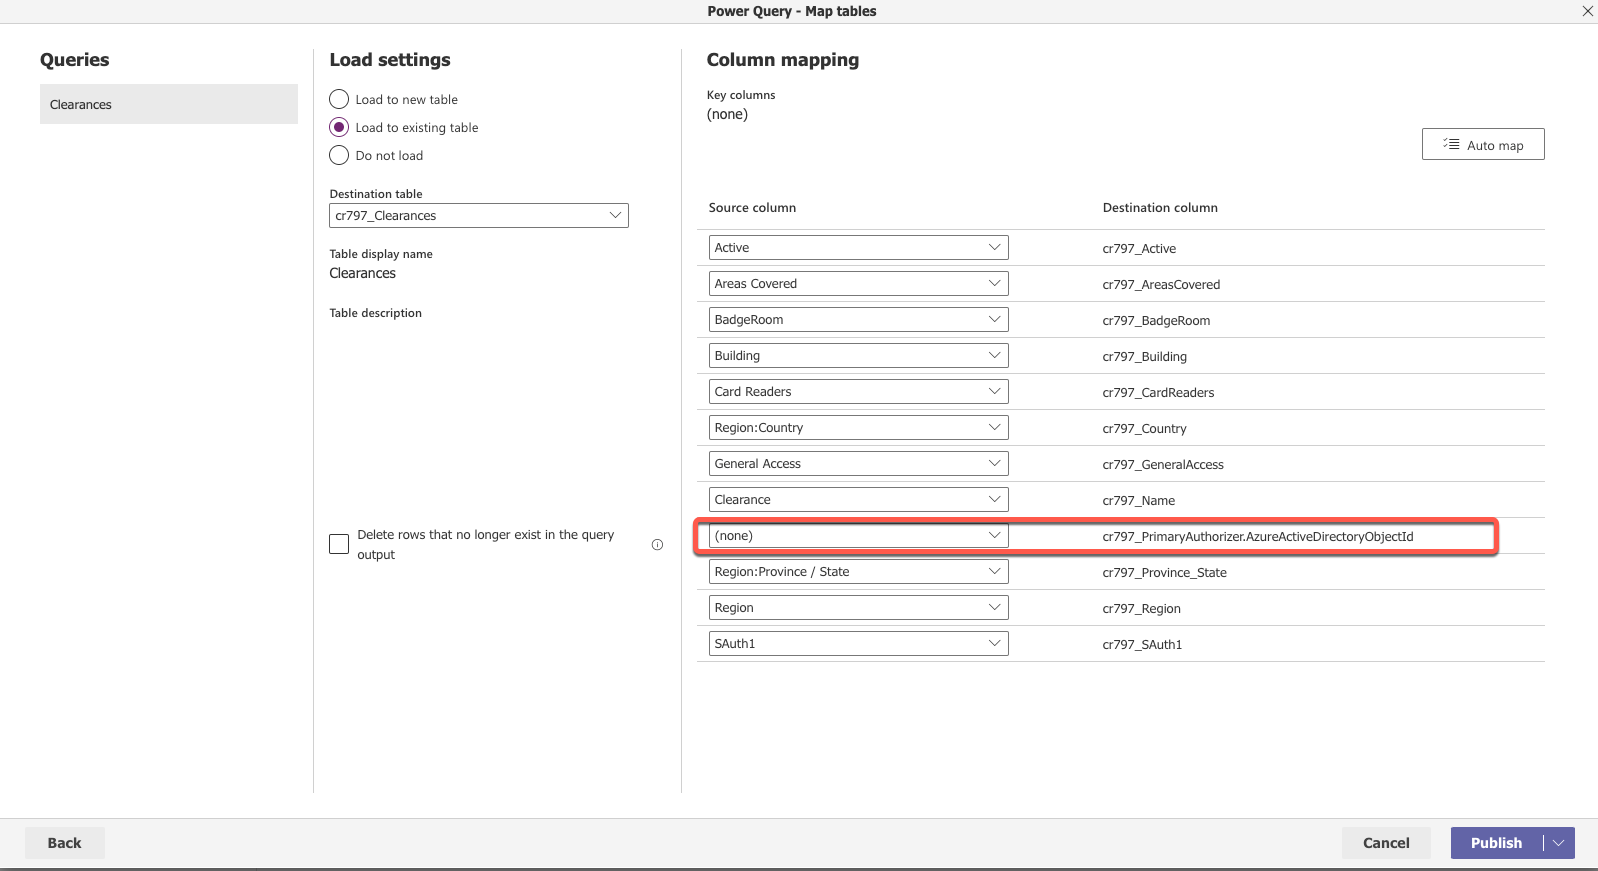
Now we need to Map our data source columns to our destination table columns.
I chose Load to existing table.
Make sure to not provide any mappings for your data table lookup columns, if you do the import will silently fail.
Once your satisfied, click Publish
Be aware that there will be no indication that Publish is doing anything, no status indicator, no messages, nothing, Microsoft it would be really nice to have some indication that this is working.
So just be patient, this has taken several minutes for me. Just keep checking that your table is populated with the imported data.
I'm Thinking! I'm Thinking! I'm Thinking! I'm Thinking!
I'm Thinking! I'm Thinking! I'm Thinking! I'm Thinking!
I'm Thinking! I'm Thinking! I'm Thinking! I'm Thinking!

Series!